Pixel Grease 2 2.0
User Guide

Contents

1. Overview
    Using this User Guide

2. Installing the Software

3. Loading and Saving Images

4. Viewing Saved Images and Correcting Problems

5. Editing Images

6. The Edit Menu
    Cropping, Cut, Copy & Paste, Screen Grabs

7. The Options Menu

8. Configuration Options
    File Types, Default Folder,
    Registration Information, General Options


9. Generating HTML

10.Troubleshooting

Appendixes

I.  Loadable File Types

II. Licensing Agreement


1. Overview
Pixel Grease 2 is a digital image editor designed to simplify the preparation of images for internet use. It provides the most commonly needed functions for resizing and compressing pictures for fast internet delivery of photographs and other digital images. It is particularly useful for preparing images for attaching to email or uploading to web sites. After some simple configuration settings, it allows the user to save a variety of customized images for such purposes as email attachments, icons and web pages. It is also invaluable for creating images to be used in wordprocessor documents, spreadsheets and databases, helping to create more manageable documents with smaller file sizes.

With Pixel Grease 2 you can automatically save multiple images of different physical sizes, different file types and different compression settings all with just one click. This feature alone can save hours of work. Furthermore, all these settings are stored so you get instant consistency. All you need to do is open an image file then click save. It may seem a little too easy but if you have quite a few pictures to resize or convert you'll be delighted that it's so easy.

If you do need to make fine adjustments to some images, the built-in editing tools allow you to quickly and precisely trim and crop images to remove unwanted detail and to adjust picture characteristics such as brightness, sharpness and contrast and white-balance. Pixel Grease 2 can also, with a single click, generate HTML script to insert pictures in a web page.


Using this User Guide...
In order to get the best out of your Pixel Grease 2 software it is recommended that you read this guide fully. Later you can call-up the guide for reference from within Pixel Grease 2 by pressing F1 on your keyboard, or by selecting 'User Guide' from the 'Help' menu in the main screen of Pixel Grease 2.

Clicking on an item in the contents index will take you directly to that topic. To search for a particular word, hold down the 'Control' key on your keyboard press 'F' to display a search box.

The numbers that appear like this: (0) refer to items indicated on the pictures that appear in the guide. If you can't see the picture in question, you can click the number to jump directly to it. Using the browser's back button will return you to the text you were reading initially.

Return to Contents


2. Installing the Software
To install Pixel Grease 2, run the installer file 'pixelgrease2inst.exe'. Installation is automatic, simply follow the instructions on screen. If you have downloaded the installer package from the internet, the installer file can be copied to disk and kept as a backup or for installing on other machines.

To uninstall the software, select 'Pixel Grease' from the 'Remove Programs' or 'Programs and Features' section of your Windows Control Panel.

Return to Contents


3. Loading and Saving Images
The first step in using Pixel Grease 2 is to load an image. Images can be loaded from any local or network drive, or even directly from digital camera storage media. A wide range of image formats can be loaded. (See Appendix I for loadable file types.) In common with most of the functions of this software, there are different ways to achieve the same task. Simply use one which suits your preferred method of working. You can load an image file using any one of the following methods...

  • Click the 'Load' button (1), or...
  • Select 'Load Image' from the 'File' menu, or...
  • Hold down your keyboard's 'Control' key and press 'L', or...
  • Double-click on a currently displayed image.

    (You can also load images by pasting from the windows clipboard or by grabbing images directly off the computer screen. These methods are discussed later in this User Guide.)

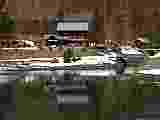
    Any of the actions in the bulleted list above will open a directory or file list from which you can locate an image to load. Double-click on an image file name and the full-size image will be displayed in the image area (2). If the image area is smaller than the actual image, you can view the whole image by using the scroll bars provided, or, if your screen size permits, by increasing the window size, or by selecting 'Fit Window' from the The Options Menu. When an image is loaded the original image's full file name and source path are displayed in the status bar (6). At this point, no image processing has occurred.

    Image Displayed in Image Area


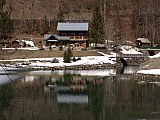
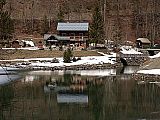
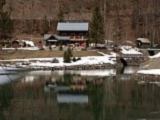
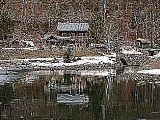
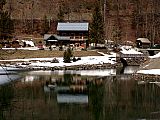
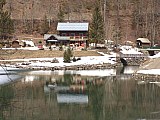
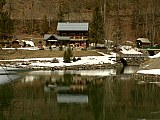
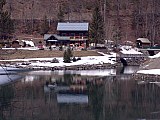
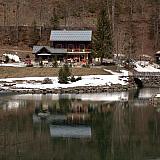
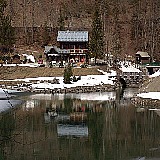
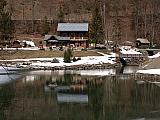
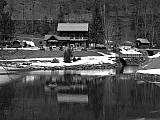
    As soon as an image is loaded, the root part of its file name is displayed in the 'Save As' box (3). For example, in the illustration above, the original file name was lakeside.jpg. By default, Pixel Grease 2 will use this same root for the new image files it creates from this original. When saving, short tags are automatically added to the file name root to help identify the different files. The default tags are '_s', '_m' and '_l' which stand for small medium and large. The default file name for a small JPG file saved from the example would be lakeside_s.jpg. The file tags can be changed via the Options Window, and you can also change the filename root simply by changing the text in the 'Save As' box (3) before saving; taking care, of course, not to repeat file names that you have already created.

    Images are saved by Pixel Grease 2 to either of two basic output folders. You can choose to save either 'to source folder' or 'to desktop' (4). If you choose to save 'to source folder', images created by the software will be saved to the same folder as the original image file. In the case of pasted images or screen-grabs they will be saved to the default source folder. If you choose to save 'to desktop', the images will be saved in a folder called 'Pixel Grease 2 Images'. You will see this folder on your Windows desktop.

    Please note that if the source folder is a read-only disk e.g. a CD ROM, a DVD ROM, a full or write-protected disk or a storage device in a digital camera it will not usually be possible to save 'to source folder' and you will need to save 'to desktop'. Alternatively, you could copy the original files to a folder on your hard drive before loading them into Pixel Grease 2.

    Pixel Grease 2 will save up to three different images. The three images are normally referred to as 'small', medium' and 'large'. The main screen has three check boxes representing these three file sizes (5). The size, type and filename settings for the small, medium and large images can be set via the Options Window. Selecting or deselecting the check boxes on the main screen determines whether or not a particular file type, as specified in the Options Window, will be saved when the 'Save' command is executed. If all three boxes are ticked, three images will be saved. To execute the 'Save' command you can...

  • Click the 'Save' button (7), or...
  • Select 'Save' from the 'File' menu, or...
  • Hold down your keyboard's 'Control' key and press 'S', or...
  • Click the 'Save' button found in the Image Edit Control Panel.

    It is worth remembering that Pixel Grease 2 does not overwrite or alter the original image file in any way, even when saving to the source folder, because Pixel Grease 2 will never output images with the same filename as the original loaded file. You should note however that the 'Save' command will overwrite, without warning, any existing files in the chosen output folder which already have the same file name as is being assigned.

    There are other ways to load images into Pixel Grease 2. Images can be pasted directly from the Windows clipboard, or grabbed from the computer screen so it is not actually necessary to start with an image file on disk. These features are discussed in the section about the Edit Menu.

    Return to Contents


    4. Viewing Saved Images and Correcting Problems
    After saving, the smallest image saved is displayed in the image area, and the size and file-type of each saved image is displayed in the status bar (6). If you have saved more than one image you can use the Image Selector Button Bar (8) to view each saved image in turn.

    Saved Images Displayed


    At this stage, if the saved images meet your requirements, there is no need to do anything else. All the resampled images have already been stored to disk and you can safely exit the program or go on to load the next image you want to process. If for some reason one or more of the images isn't correct, you can adjust the settings in the Options Window or the Image Edit Control Panel, reload the original image and click 'Save' again.

    Return to Contents


    5. Editing Images
    Pixel Grease 2 provides a series of image editing tools which can be used to improve images. To adjust the characteristics of a loaded image, either right-click on the image area, or select 'Edit Image' from the 'Edit' menu, or press 'Control' + 'I'. Any of these actions will display an Editing Control Panel...


    The controls on the 'Edit Image' control panel work as follows...

    Sharpness- Moving this slider to the right increases the sharpness of the image. Moving it to the left softens the image. Generally, this control should be used in extreme moderation. Over-sharpening or over-softening can produce interesting but usually unpleasant images. Also, making multiple adjustments with the slider can degrade the image quality. It is best to make the adjustment with just one movement of the slider. If you're not happy with an adjustment you made, click Undo and adjust again.


    Unedited image

    Sharpened

    Softened

    Over Sharpened


    Contrast - Move this slider to the right to increase contrast, left to reduce contrast.

    Reduced Contrast

    Increased Contrast


    Brightness - Adjust this slider to brighten or darken the image.


    Both Brightness and Contrast Increased
    White Bal. - Use this control to correct the white balance of an image. Moving the slider to the right makes the image colder, moving it to the left makes it warmer.


    Warmer

    Colder


    Cancel - The 'Cancel' button aborts the current edit and closes the Image Edit control panel.

    Undo - The 'Undo' button causes the image to revert to its unedited state without closing the Image Edit control panel.

    Save - The 'Save' button executes the Save command and saves edited images to disk in accordance with the output file name set in the 'Save As' box (3), the output location (4) and the Output Files settings (5).

    Clear Image - The 'Clear Image' button unloads the current image from Pixel Grease 2 and closes the Image Edit control panel.

    It is also possible to crop a portion of an image using the 'Crop Image' command found in the Edit Menu.

    Return to Contents


    6. The Edit Menu


    The 'Edit' menu commands can be accessed either by clicking on the menu itself or by using the keyboard shortcuts shown alongside each command. For example: Pressing 'Ctrl' + 'I' opens the Image Edit Control Panel (if there is an image loaded that can be edited). The other commands work as follows...

    Crop Image - Use cropping if you want the saved images to contain only a specific area of the original image. Cropping is like 'zooming-in' to the main subject matter and it is one of the many features that Pixel Grease 2 provides to allow images to be smaller and more efficient. The 'Crop Image' command activates the cropping area selection tool, a cross shaped cursor which is displayed over the loaded image. Use the mouse to position the centre of the cross at one corner of the part of the image that you wish to keep, then, holding down the left mouse button, drag across to the opposite corner of the area you wish to keep and release the mouse button. The selected area then appears as a negative image. If you're happy with the picture area you have selected, simply click the right-hand mouse button to perform the crop.


    Selecting a Cropping Area


    Original Image

    Cropped Image


    To cancel the selection and abort the crop, click the left-hand mouse button. In common with all other functions of Pixel Grease 2, cropping the image does not affect the original image file. Only the new images saved by Pixel Grease 2 are affected.

    Clear Image - The 'Clear Image' button unloads the current image from Pixel Grease 2 without saving.

    Cut - Copies the currently displayed image to the Windows clipboard so that it can be pasted into other programs such as a word processor or DTP package. The loaded image is simultaneously unloaded from Pixel Grease 2.

    Copy - Copies the currently displayed image to the Windows clipboard so that it can be pasted into other programs. The image remains loaded in Pixel Grease 2.

    Paste - Pastes a valid image held on the Windows clipboard into Pixel Grease 2. As an image is pasted, the file name root in the 'Save As' box (3) will be set to "Clipboardn", where n is a number automatically assigned by the software. For example: Images saved from the first image you paste will be assigned a file name beginning with "Clipboard1", the next will be "Clipboard2" etc. If you wish, you can change the file name root to something different before saving, taking care not to create a file name which already exists in the output folder. The output folder, will be, depending on the option selected, either the 'Pixel Grease Images' folder on the desktop, or the default source folder where image files are normally loaded from.

    After pasting an image you may reset the number sequence by selecting "Reset Clipboard Count" from the 'Options' menu. This will reset the count (n) back to 1, however before doing that, you will be reminded to consider whether the output folder already contains wanted files named Clipboard1..2..3 etc. because, if both the file types and the filename tags of the older files are identical they will be overwritten with the new files without further warning.

    Grab Screen - This command takes a snapshot of the entire area of the computer screen and loads it into Pixel Grease 2. The snapshot is taken after a short delay, giving you time to arrange the screen as you wish. The number of seconds delay can be adjusted in the Configuration Options Window. As the snapshot is taken, the file name root in the 'Save As' box (3) will be set to "Screenshotn", where n is a number, automatically assigned by the software. This works in the same way that file name roots are automatically assigned to images pasted from the clipboard but the numbers are assigned independently

    If you wish, after doing a screen grab (or a window grab as described below) you can reset the screenshot count by selecting "Reset Screenshot Count" from the 'Options' menu. This will reset the count (n) back to 1. Before doing this you will be reminded to consider whether the output folder already contains files named Screenshot1..2..3 etc. because, if the both the file types and file name tags of the older files are also the same they will be overwritten without further warning. As with pasted images, the output folder can be either the 'Pixel Grease Images' folder on the desktop or the default picture folder.

    Grab Window - This command is very similar to the Grab Screen command but the snapshot is taken only of the active program window on screen. The duration of the delay is the same as for the Grab Screen command and is designed to give you time to select the window you want to snap. You can use the Windows task bar or 'Alt' + 'Tab' key combination to switch between the windows of the different programs that are running, and then back to Pixel Grease 2 after the snapshot has been taken. As the snapshot is taken, the file name root in the 'Save As' box (3) will be set to "Screenshotn" for saving in exactly the same way as when using the 'Grab Screen' command, i.e. the filename roots will be "Screenshot1", "Screenshot2" etc.

    Return to Contents


    7. The Options Menu


    Setup Options - This first item in the 'Options' menu opens the Configuration Options window which is explained in detail in section 8. below.

    Shrink by 10% / 25% / 50% - These shrink commands allow you zoom-out by reducing the size of the loaded image display. Using these commands has no effect on the size of the images you save. The shrink commands are useful if you want to see the whole area of a very large image. The shrink commands only work if the loaded image, when shrunk, will still be at least as big as the largest image set to be saved in the Configuration Options. You can also access these commands using the F5, F6, and F7 keys on your keyboard.

    Fit Window - Like the shrink commands above, 'Fit Window' zooms-out so that the loaded image fits the available window area, allowing you to see the whole picture without using the scroll bars. The image will only be shrunk if the window area is bigger than the largest image set to be saved. The size of the saved images is not affected by this command. The F8 key on your keyboard works as a shortcut to this command.

    Fit Window On Load - This option allows you to select whether large images will automatically be reduced to fit the window as soon as they are loaded. To activate or deactivate this option, click the menu item. When active, a tick appears in the menu. Note that, in common with the other shrink commands, the image will only be shrunk to fit the window if the available window area is bigger than the largest image set to be saved.

    Fast Resizing - When resizing images, Pixel Grease 2 normally passes the image through a complex rescaling algorithm which resamples and applies antialiasing filters to the image to obtain the highest quality images. Fast resizing allows you to bypass the most complex rescaling functions so that images are resized much more quickly, saving you time. The down side of this is that, in most cases, the resulting image quality will not be as good. Fast resizing is switched on or off in the same way as the 'Fit Window on Load' option. When fast resizing is 'on' a tick is visible next to this menu item.

    Reset Screenshot/Clipboard Count - These menu items are for resetting the automatic file name counters for Screen Grabs, as explained in section 6 above.

    Return to Contents


    8. Configuration Options
    The Configuration Options window is the heart of Pixel Grease 2. The settings made in this window are stored and used to control the automatic features of the program. On the left-hand side of the window are three panels which control the individual characteristics of the small, medium and large images saved by the program. These panels work in essentially the same way as each other, they simply correspond to the different image size options. The six options at the top (10)of each panel control the size of the output images and the way in which each image is re-scaled.


    Height and Width Settings - These boxes are for basic setting of the width and height of each saved image. The units are pixels, the basic unit of measurement for digital images. If one or other of the 'Fixed Height' or 'Fixed Width' options is selected, then the other dimension becomes dependent on the aspect ratio (the shape) of the original image.

    Pixels in the Real World - The relationship between pixels and real-world measurements such as centimetres and inches is not fixed. It is dependent on the size and configuration of the particular display screen, software or printer. Generally; a big display or printout needs more pixels and a smaller display or print needs less. As a guide; An image 200 pixels wide, displayed on a 17 inch, SVGA (600x800) monitor appears about 8.5 cm (approx. 3.3 inches) wide. In terms of required disk space or internet transmission and loading times, less pixels make for faster transmission and less disk space. Images with more pixels invariably yield slower results and typically require more disk space, though these problems can be reduced by using compression formats such as GIF, JPG and PNG. Optimum results are achieved using the combined effects of reducing pixel numbers and simultaneously using these compressed formats.

    IMAGE SHAPE HANDLING - The ratio between the height and width of an image is called the aspect ratio. A perfectly square image has an aspect ratio of 1:1, computer screens and many digital cameras have an image aspect ratio of 4:3 (where the height is three-quarters the width), in some cases the ratio is 3:2 (where the height is two thirds the width), 16:9 and other aspects are also common. Resizing images that already have the aspect ratio you require is straightforward, however, where there may be differences between the image aspect ratios you should decide how Pixel Grease should deal with these differences. There is no single correct way. Here are the options available to you...

    Crop Exact - If 'Crop Exact' is selected the resulting images are saved with the exact height and width settings you specify. If the aspect ratio of the original image is not the same as the ratio between the chosen settings, then a portion of the image is automatically cropped off so that the image fits into the new shaped rectangle without distortion. Notice in the example below, how when creating a square image, the both sides of the original oblong image have been automatically sliced off to make a square.


    Height=160, Width=160, Crop Exact


    Allow Distortion - As with 'Crop Exact', if 'Allow Distortion' is selected the resulting images are saved with your chosen height and width settings, but in this case, no slicing takes place, even if the aspect ratio of the saved image differs from the original. In such a case, the image will be 'squashed' to fit it into the new shape. The example below shows how, when saving our original oblong image as a square, the image has been squeezed in from the sides. Use this setting with caution, especially if there are people or circular shapes in your pictures, the squashed effect is generally undesirable.


    Height=160, Width=160, Allow Distortion


    Fixed Width / Fixed Height - Fixing either the Height or Width setting, leaving the other dimension to depend on the aspect ratio of the original image, avoids any need for the image to be cropped or distorted, however, this means that unless all the different original images are all the same shape then either the height or the width of the resulting images will be different (depending on whether you choose to fix the height or the width). The images below illustrate the effect of fixing either the height or the width of the same image. The aspect ratio is preserved and the non-fixed dimension gets set automatically.


    Width Fixed at 160

    Height Fixed at 160
    File Type Selection - Regardless of file type of the original image, each saved image can be in any one of a variety of popular formats. Simply select the desired format from the drop-down list (11).

    JPG - (Short for JPEG which is stands for Joint Photographic Experts Group). The JPG format is widely considered to be the ideal format for the delivery of photographic images across the internet. Using an advanced data compression technique, information is removed from an image to yield a picture which can look virtually identical to the original, whilst using a greatly reduced amount of digital information. Pixel Grease 2 lets you select JPG quality settings between 5% and 100% (12). 100% is the highest quality setting but lower settings result in fantastically smaller file sizes. At about 60% quality, the results can be almost indistinguishable from the original image. Choosing a quality setting is a matter of preference. All other things being equal, the lower the quality setting, the faster your images will travel over the internet. Using settings lower than 15% is not recommended as the resulting image quality will be poor. If you are creating JPG images for a web site, selecting 'Prog' results in a file which will be displayed very quickly, starting-off blurry and progressively improving in quality as the rest of the file streams-in. If the 'Prog' option is not selected, the images will tend to load into a browser at maximum sharpness starting from the top downwards, like a blind being pulled down.

    When working with JPGs, you should be aware that JPG compression is lossy. This means that even a 100% quality JPG image saved at the same pixel size as an original image will not faithfully retain all the original data in an image. The saved image may look identical to the original but data has been removed. Therefore you should not delete important original files in case you need to make additional edits or adjustments.


    A High Quality JPG
    Quality Setting: 60%
    File size: 9 Kb

    A Low Quality JPG
    Quality Setting: 12%
    File size: 1.6 Kb


    GIF - The GIF or Graphics Interchange Format uses a highly efficient, compression technique which, depending on the kind of image being saved, can result in comparatively small file sizes. This format is highly recommended for images which don't contain much tonal gradation and which have large areas or lines of solid blocks of a single shade. Consequently, the GIF format is not generally recommended for storing typical photographic images but it can be great for drawings or typographic images like this Pixel Grease logo...

    <font color=#000088><b>Pixel Grease 2</b></font>


    AUTO JPG / GIF - (This is the default setting.) Use the 'AUTO JPG /GIF' setting if you want to create either JPGs or GIFs based on the original format of the image. If the original image is a GIF it will be saved as a GIF. All other source file formats will be saved as JPGs using the Quality and Prog. settings specified.

    PNG - This Portable Network Graphics format offers good compression and goes some way to providing some of the advantages of both GIF and JPG formats, however, due the there being a variety of PNG types there are sometimes compatibility issues and consequently it tends to be less common than JPG or GIF.

    AUTO PNG / GIF - With this setting, if the original image is a GIF it will be saved as a GIF. Other source file formats will be saved as PNGs.

    BMP - Bitmap images faithfully store every pixel and are widely supported by even some very old software, however, file sizes can be prohibitively large and consequently they are not normally recommended for internet use.

    TIF - Tagged Image Format files are another popular kind of bitmap file.

    ICO - This is the popular 32 pixel square icon format is used extensively in a variety of software including Microsoft Windows and web browsers which look for an icon file called favicon.ico file stored along with a web page in a web server directory.

    File Tag - The 'File Tag' box(13) contains a string of characters that will be appended to the file name root assigned to each picture. This is an important feature of Pixel Grease 2 as it not only helps to identify which saved files are which, it also helps prevent different files from being given the same file name. The default file tags for the small, medium and large files are '_s', '_m' and '_l'. For example: Say you wish to save small and medium JPG images plus a large BMP image. If filename root is 'lakeside' the resulting output filenames would be lakeside_s.jpg, lakeside_m.jpg and lakeside_l.bmp. You can change the file tag strings using a maximum of six characters for each. For example: If you are using the small files as thumbnails you could change the small file tag to _thumb. The 'lakeside' file would then be saved as lakeside_thumb.jpg making it easy to identify the file as one of your thumbnail images. In common with the other settings in the Options settings, the File Tag settings are stored for subsequent file saves until you change them or reset to the defaults by clicking the 'Reset Defaults' button.

    Other Output Settings(13) - The 'Black & White' option allows you specify that an image will be saved in black and white, even if the original file was not black and white. (Black and white images are automatically saved in black and white anyway, unless you have altered the white balance.) If 'Sharpen' is checked, an unsharp mask filter is automatically applied to saved image. This filter can improve the appearance of the saved images.


    A Black & White JPG


    Resetting Defaults - Clicking the 'Reset Defaults' button sets all the output options to their default settings as follows...

    Defaults for Individual Images
    ImageHeightWidthFile Tag
    Small120160_s
    Medium240320_m
    Large480640_l

    Defaults for All Images
    Crop ExactON
    Allow DistortionOFF
    File typeAuto JPG/GIF
    JPG Quality50
    JPG Prog.OFF
    Black&WhiteOFF
    SharpenON

    Default Source Folder - The directory list box headed 'Default Folder to Open Picture Files From' (15) allows you to specify which folder will be opened first when the 'Load Image' command is executed. Ideally you should set this folder to the folder where most of your original images are stored. If images from your digital camera or scanner are saved in a particular folder, you may want to set that folder as the default. This feature saves time by avoiding the need for you to navigate to the correct folder every time you want to load an image. To set the default folder, simply select the appropriate disk drive first, then navigate to the folder you want by double-clicking any folders which contain it. Having located the folder, double-click click on it so that its icon changes to an open folder then click it again. The last open folder you click before closing the 'Options' window will be the one that is set as the default.


    Registration Information (16) - This section shows your 'Machine Number' which identifies your computer, along with the registration status of the installation of Pixel Grease 2 that you are using. If the software is unregistered the 'Free Trial Progress' indicator shows how far the free trial has progressed. If the indicator has reached the black portion at the end of the scale, the free trial has expired and the software must be registered if you wish to continue using it.

    Registration is not expensive and is done on a 'per machine' basis. Quantity discounts are available if you are buying the software for four or more machines. To register online, click the 'Register Online' button or visit the Pixel Grease Web Site. When registering you need to provide the 'Machine Number' for each machine you wish to register. This is done to prevent software piracy. The machine number can only be found from within Pixel Grease 2 so you must install the software on each machine to find the number. (If you use the 'Register Online' button in Pixel Grease 2, the Machine Number for the machine you are using will be entered automatically for you into the online registration form.) Having registered, you will receive, by email, the registration number for the machine. Carefully enter it into the Registration Number box to complete the registration process. It is possible to register first and provide a machine number later but it will take a little longer for that registration number to be issued.

    General Options (17) ...

    Enable Sounds - If your machine has audio capabilities switched on, and this box is ticked, you will hear sounds during normal operation of the program.

    Show Help Tips Over Image Display - Removing the tick from this box will halt the display of the helpful tips which otherwise pop-up when resting the mouse pointer over the image display.

    Snapshot Delay - This is the adjustable delay between initiating either the 'Grab Screen' or 'Grab Window' commands from the Edit Menu. The delay can be set between two seconds and nine seconds as you prefer. If the sounds are enabled, a sound will be heard as each second passes.

    Return to Contents


    9. Generating HTML
    To simplify putting images into your web pages, Pixel Grease 2 will instantly generate HTML script for any of the images that have just been saved. Select one of the saved images by clicking on the Image Selector Button Bar (8) then, with the mouse pointer positioned over the image, click the right-hand mouse button. The HTML window immediately appears and displays HTML script to place that image in a web page. Clicking the 'Remove Quotes' button will remove all the double quotes from the script. This is useful if the script is to be used in conjunction with other scripting languages. To edit the HTML script, place the cursor in the script area and type. Typical edits you might want to perform are:

    1. to change the file path - If the image will not be located in the same folder as the HTML script you might want to add the path to the file, e.g. by changing "lakeside_s.jpg" to "images/lakeside_s.jpg" web browsers will look for the image in a folder called "/images/" instead of in the same directory as the web page. (Use "../images/" if the web page is in a subdirectory and "images" is another sub directory.)

    2. Add an ALT text string - This is a string of text that can be displayed whilst the picture is loading into a browser or when the mouse pointer is positioned over it. It is also serves to inform text-based browsers what is in the picture. This is particularly useful if your site will be visited by any blind or visually impaired persons who may rely on a speech or braille output in order to read web pages. e.g. ALT="A view across the lake.".

    3. Change the border width - e.g. BORDER="2"places a 2 pixel border around the image when it is displayed in a browser.

    Don't be tempted to change the image Height and Width. These have been automatically set correctly for the image. Forcing an image of one size into a different size box can have unpleasant effects. If you need a different image size... adjust the settings in the Configuration Options, reload the image and click Save.

    Clicking the 'Copy to Clipboard' button copies the script to Windows clipboard and closes the HTML window. The script can then be pasted straight into an HTML script using the 'Paste' command in your HTML editing software. The 'Cancel' button closes the HTML window without copying the script to the clipboard.

    Note: The generated IMG tags are valid, unmodified, for all versions of HTML including HTML 5, however if you're preparing script for an "XHTML Strict" doctype you will need to convert the tag names to lower case and close each tag with an end slash.

    Return to Contents


    10. Troubleshooting
    Pixel Grease 2 has been extensively tested and once you become familiar with it, it should provide you with endless hours of trouble-free service. Like all software however, it may be affected by the individual quirks of particular computers. Image processing can be quite demanding in terms of memory and processing power, especially if you are working with very large images. The following guidelines should help you resolve any difficulties which may arise. Most topics are covered in the rest of this this user guide and there is additional information of the Frequently Asked Questions (FAQ) section of the Pixel Grease Web Site.

    Unexpected Results When Saving Images: This may be due to a lack of available memory. Aside from the possibility of upgrading your computer, if you do encounter such problems, any or all of the following suggestions may be helpful... 1. If you have other programs running that you don't need, close them.   2. Turn-off the 'Enable sounds' and 'Show Help Tips Over Image Display' options.   3. Don't output more images than you need.   4. Don't output bigger images than you need.   5. Use the 'Shrink' or 'Fit Window' options when working with large images.   6. Set up your file size save options before loading images.    7. Turn-on 'Fast Resizing'.

    Where are my Saved Images?: Pixel Grease 2 saves images in either of two possible locations. The location used is the one selected at the top of the main window before saving. The first is 'source folder' This is the same location that the original image was loaded from. This will vary depending on where the original image files are. For example: If the original picture was in your "My Documents\My Pictures" folder, that's where you will also find the saved pictures. If 'to desktop' was the option selected the saved pictures will be found in a folder on your desktop called 'Pixel Grease Images'. If the image was a screen grab, or was pasted into Pixel Grease 2 from the clipboard, the resulting files can be saved in the 'Pixel Grease Images' folder on the desktop or in the default source folder as specified in the Setup Options.

    Saved JPG Images are of Poor Quality: Check the JPG Quality settings for each image size in the Options window. Best quality results are achieved with quality settings above 70%, the very best is 100%. Very low settings (e.g. 15) or less will yield blocky and generally unusable results. Saving in BMP or TIF formats can yield still higher quality images. Also, if you need maximum quality, turn-off 'Fast Resizing'.

    Default Source Folder Doesn't Stick: In the Setup Options, when setting the default folder from which to open image files, you need to double-click the desired folder so that it appears to open. A single click is not sufficient.

    Small Images are Not Saved at the Correct Size: This known to happen occasionally when Pixel Grease has just been installed. Check the small image settings in Options then close and re-start the program.

    Return to Contents


    Appendix I
    Loadable File Types
  • GIF
  • JPEG
  • TIF
  • TIFF
  • PNG
  • PSP
  • PCX
  • VDA
  • JPG
  • PCD
  • RLE
  • WBMP
  • VST
  • PBM
  • PGM
  • SGI
  • BMP
  • PSD
  • PPM
  • WMF
  • TGA
  • EMF
  • ICO
  • ICB
  • Return to Contents


    Appendix II
    Licensing Agreement

    a. This software and any associated media files are protected by international copyright laws. By using the software you agree to be bound by all of the following terms.

    b. You are automatically licensed to use this software, in its unmodified free trial form, on any suitable computer. The software may be used in its full/upgraded form only if it has been registered with Mirage Audio Visual Media for use on the machine on which it is installed.

    c. You may freely distribute the software, in its unmodified free trial form, provided that all related media files including the user guide the text of this licensing agreement, accompanies the software always.

    d. You will not make any attempt to unofficially upgrade a copy of the software to the full version nor make any attempt to extend the limit of the free trial.

    e. Registration numbers must not be disclosed to any unauthorised third party.

    f. You will not attempt to plagiarise, disassemble, decompile or modify the software or any accompanying documentation or files in any way.

    g. Title to this software shall remain with Mirage Audio Visual Media.

    h. Mirage Audio Visual Media, Mirage AVM and Pixel Grease are trade marks of Mirage Audio Visual Media. Other trademarks mentioned within the software or accompanying documentation are trademarks of their respective owners.

    i. This software, together with its associated information and files is provided 'as is' and neither the author, publisher nor any agent will be held responsible for loss or damage of any nature arising either directly or indirectly as a result of its use or misuse. No warranty of any kind is given relating to the accuracy or suitability of this software or associated information or files for any particular purpose.

    j. In the event of a dispute all parties will submit to the jurisdiction of the courts of law in England.

    k. In any event, the collective liability of the author, publisher and any agent will not exceed either (at their discretion) a replacement of the product or refund of the original purchase price.

    Return to Help

    pguguide.htm v.2.41   © Mirage Audio Visual Media